
Submitting a mobile app without real-user beta testing can turn fixable issues into public problems. TestFlight and Google Play testing tracks give iOS and Android teams a safer path: validate the build, learn from real users, and submit with fewer avoidable surprises.
Test Builds Without Chaos: Clean Beta Process Guide goes deeper on the ideas above and adds concrete next steps.
How do TestFlight and Google Play testing tracks compare?
Apple and Google both provide beta infrastructure, but the rules are not identical. Apple documents TestFlight limits and build behavior in its TestFlight overview, while Google explains Android test tracks in Play Console Help.
| Track | Best use | Tester limit | Review gate | Planning note |
|---|---|---|---|---|
| TestFlight Internal Testing | Fast iOS team QA | Up to 100 App Store Connect users | No external Beta App Review | Best for install, login, purchases, push, and crash checks |
| TestFlight External Beta | Controlled or broader iOS beta | Up to 10,000 external testers | Requires Beta App Review before external distribution | Useful for known users or public links, but budget review time |
| Google Play Internal Testing | Fast Android sanity check | Up to 100 testers | Review requirements can vary by release context | Best before closed or open Android testing |
| Google Play Closed Testing | Structured Android feedback | Email list or Google Group | May require review depending on account and release context | Good for customers, communities, or targeted testers |
| Google Play Open Testing | Broad Android validation | Broad public testing through Play | May require review | Best for device, manufacturer, carrier, and onboarding diversity |
The practical interpretation is simple. Internal tracks are for speed, external or closed tracks are for controlled feedback, and open or public-link testing is for broader validation.
The business impact is risk reduction, not perfection. A focused beta can catch crashes, confusing onboarding, install failures, billing issues, and device-specific bugs before they become public reviews, support tickets, refunds, or delayed submissions.
When you move from outline to execution, Map App Data Flows and Release Strategy for First Submission helps close common gaps teams hit here.
Why beta tracks reduce launch-day risk
Most launch problems are not caused by an obvious broken button that every developer missed. They often appear only when the app touches real devices, real networks, and first-time users.
The biggest risks usually fall into three buckets:
- Device-specific issues on Samsung, Xiaomi, older iPhones, low-memory devices, or unusual screen sizes
- Network-specific issues on weak mobile data, captive Wi-Fi, roaming connections, or delayed API responses
- Fresh-user confusion during onboarding, account creation, permissions, checkout, or first-session activation
Simulator testing and internal QA are useful, but they are not enough. Your team already knows what the app is supposed to do. A new tester does not.
In practice, most teams should not choose only one track. A safer workflow is internal testing first, controlled beta second, and open or public-link testing only when broader validation is worth the extra noise.
A complementary angle worth comparing lives in App Store Connect vs Google Play Console: Key Differences.
A practical one-week beta workflow
A one-week beta is short, but it can still reduce launch risk if the scope is realistic. You will not validate every edge case in a week, so focus on install, activation, crash behavior, account flows, and any revenue-critical path.
| Timing | Focus | What to check |
|---|---|---|
| Day 1 | Internal QA | Install, login, crash behavior, permissions, push notifications, payments, analytics events |
| Days 2-5 | External or closed beta | Onboarding, first-session tasks, feedback form responses, device and OS diversity |
| Day 6 or 7 | Go/no-go review | Crash trends, severe bugs, repeated support questions, unresolved blockers |
The key is not the number of testers alone. A small, well-instructed group can be more useful than a large group that receives no task, no feedback form, and no deadline.
For a meaningful one-week beta, plan a few hours before testing to prepare instructions, tester lists, feedback forms, and support coverage. Also reserve time after testing to triage issues, assign owners, fix defects, and retest affected flows.
For tradeoffs, checklists, and edge cases, How to Publish Your Lovable App: From Export to Approval rounds out this section.
What is TestFlight used for before App Store submission?
Internal TestFlight: use it for daily QA
Upload your iOS build through Xcode or App Store Connect, then make it available to internal testers. According to Apple's TestFlight documentation, internal testers must be part of your App Store Connect team.
Internal TestFlight supports up to 100 App Store Connect users. Use it for developers, QA, product leads, support leads, and anyone who needs fast access to daily or near-daily builds.
Use this stage to verify:
- Install and launch
- Login and account creation
- Push notifications
- In-app purchases or subscriptions
- Deep links
- Permissions
- Analytics events
- Crash monitoring
The common mistake is inviting only people who already understand the product and calling that a beta. Internal testers move quickly, but they are poor substitutes for fresh users.
External Beta: plan around review and expiration
External TestFlight is the iOS path for testers outside your App Store Connect team. Apple requires external beta builds to go through Beta App Review before distribution.
Use this track when you need real feedback from customers, advisors, partners, educators, clinicians, creators, or community members.
Practical setup notes:
- Submit the external beta build for Beta App Review before inviting outside testers.
- Use invitation-only distribution when tester identity matters.
- Use a public TestFlight link when reach and device diversity matter more than control.
- Add a calendar reminder for the 90-day TestFlight build expiration window.
- Replace expired builds before testers are stranded on an unusable version.
Beta App Review is still a real gate. Do not schedule your first external beta invite for the same hour you upload the build.
Invite-only versus public TestFlight links
| Distribution mode | Tester control | Maximum reach | Risk | Feedback quality |
|---|---|---|---|---|
| Invitation-only TestFlight | High | Limited to invited users | Lower link spread | Usually higher because you know who is testing |
| Public TestFlight link | Lower | Broad, up to TestFlight external limits | Link can spread beyond your audience | Mixed unless paired with a clear feedback process |
Use invite-only TestFlight for customers, investors, clinicians, educators, enterprise buyers, or regulated-user groups where identity matters. You will get fewer random installs, but feedback is easier to interpret.
Use a public link for consumer apps that need broader device coverage and first-session behavior. The tradeoff is control. A public link can travel beyond your intended audience, so expect noisier feedback and less context.
How do Google Play testing tracks work before launch?
Internal Testing: run the Android sanity check
Use Google Play Internal Testing for a fast Android validation loop. Google documents internal, closed, and open testing setup in Play Console Help.
Invite internal testers from your team, QA group, support, and trusted technical reviewers. The goal is not market validation. The goal is to confirm that the build can install, launch, authenticate, and complete essential flows.
Android fragmentation makes this step especially important. Check crash-free launch, permissions, billing configuration, push notifications, deep links, navigation, and device compatibility before moving wider.
Closed Testing: collect structured feedback
Closed Testing is the Android path for controlled beta feedback from known users. It sits between internal QA and broad open testing.
Use it when you need targeted input without exposing the app to everyone:
- Create a closed testing group using an email list or Google Group.
- Invite existing customers, community members, partners, or trusted early users.
- Submit the build for review if required by your account and track context.
- Give testers specific tasks, such as completing onboarding, checkout, or first session.
- Collect device model, Android version, network type, reproduction steps, and severity rating.
One important constraint: some new personal developer accounts may need to run closed testing with at least 12 testers for 14 days before applying for production access. Check your Play Console requirements early so this does not surprise you near launch.
Open Testing: validate coverage before production
Use Google Play Open Testing when your main risk is coverage. Android launches can behave differently across manufacturers, OS versions, carriers, screen sizes, and performance tiers.
Open testing is useful, but it is not casual marketing. Treat it as a measurement stage:
- Watch Play Console for crashes, ANRs, install failures, and review-style feedback.
- Segment issues by device model, Android version, country, and app version.
- Avoid widening distribution if severe bugs are still open.
- If Play Console lets you promote the same artifact through tracks, confirm release settings and review status before production.
The practical takeaway: open testing can improve confidence, but it also creates more feedback to triage. Plan support time before you invite a large audience.
Turn beta feedback into a release decision
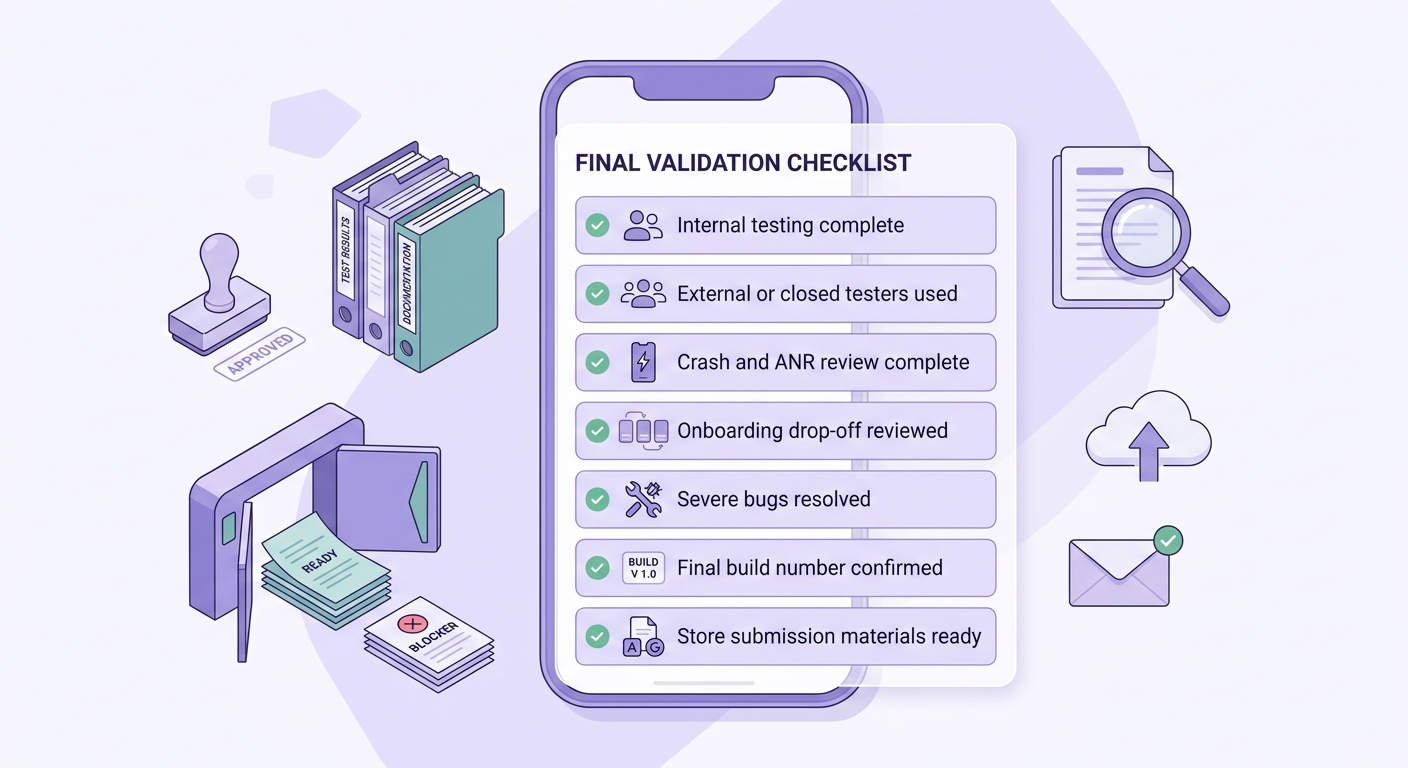
A mobile-friendly checklist block for final beta validation, including internal testing complete, external or closed testers used, crash and ANR review complete, onboarding drop-off reviewed, severe bugs resolved, final build number confirmed, and store submission materials ready.
Define blockers before testing starts
A beta is only useful if the results can change the release decision. Before submitting to App Store review or promoting to Google Play production, define what blocks release.
Block submission if you still have:
- Severity-one crashes
- Login failures
- Purchase or subscription failures
- Data-loss bugs
- Broken onboarding steps that prevent activation
- Permission flows that trap users or hide core value
Also review crash-free sessions, onboarding completion, activation rate, tester drop-off by screen, and repeated support questions. If many testers abandon the same onboarding screen, fix it before production.
Beta testing reduces risk, but it does not eliminate production failures. Teams still need clear ownership, time to triage, time to fix, and time to retest before a launch decision is credible.
Avoid common beta mistakes
Several patterns make beta testing look active while producing weak evidence.
| Mistake | Why it hurts | Better approach |
|---|---|---|
| Only using internal testers | Your team already understands the product | Add fresh users before public launch |
| Sending a public link without a feedback plan | Reach without structure creates noise | Give testers tasks and one simple form |
| Changing code after beta without retesting | The tested build is no longer the same build | Repeat checks for affected flows |
| Ignoring weak-network behavior | Many mobile bugs appear during slow or failed requests | Test offline, retry, and poor connectivity states |
Beta testing is not complete when people install the app. It is complete when you can explain what they tested, what failed, what changed, and why the final build is safe enough to release.
Release readiness checklist
Use this checklist before submitting to App Store review or promoting a Google Play build to production.
| Area | Release-ready check |
|---|---|
| Platform coverage | Internal testing is complete on every supported platform and real devices were used. |
| User coverage | External or closed testers included target user types, not only teammates. |
| Core flows | Install, login, onboarding, permissions, payments, push, and first-session journeys were checked. |
| Reliability | Crash data, ANRs, install failures, and severe errors were reviewed. |
| Feedback | Repeated support questions and onboarding drop-off patterns were reviewed. |
| Fixes | Known blockers have owners, deadlines, and retest plans. |
| Changes | Any post-beta code changes were retested in the relevant track. |
| Store setup | Store listing, privacy labels, permissions, and billing configuration were checked. |
| Launch response | The team has a hotfix, rollback, staged rollout, or support plan if launch issues appear. |
This checklist will not guarantee a flawless release. It gives your team a clearer basis for deciding whether the remaining risk is acceptable.
Practical workflow summary
A simple staged workflow works for most teams:
Run internal testing first
Confirm the build installs, launches, authenticates, tracks crashes, and completes core flows. This usually takes a few hours to a day, depending on team size and platform complexity.
Move to controlled beta
Invite known testers through TestFlight External Beta or Google Play Closed Testing. Give them clear tasks, a deadline, and a short feedback form.
Expand only if broader coverage is worth it
Use a public TestFlight link or Google Play Open Testing when device diversity and real-world usage patterns matter more than tight tester control.
Review evidence before production
Look at crashes, ANRs, onboarding completion, support questions, and unresolved severe bugs. If the evidence is weak or incomplete, extend testing rather than forcing a launch date.
The best beta process is not the biggest one. It is the one your team can actually run, monitor, and act on before submission.


